Create A Facebook Page For Your Building In 5 Simple Steps


Facebook is no longer an option for companies, it’s a requirement. This is especially important if your facility is one that houses students or many working employees. Facebook is a great resource you can use to update construction information, maintenance closures, seasonal protocol and just fun events happening in and around your building. You want to create a community where people feel welcome and educated. Here’s how to get started.
Step 1: Choose Your Classification
To get to the image below, go to your personal Facebook home screen once you’ve logged in. Then select the drop down arrow at the top right side of your screen. Click on the option “create page”. If you’re creating a page for your office building, it’s probably best to select the first option. Although, depending on how you want to use your page, you could select the second option as well.
Your options are:
- Local Business or Place
- Company Organization or Institution
- Brand or Product
- Artist Band or Public Figure
- Entertainment
- Cause or Community

Step 2: Enter Your Building’s Information
Once you’ve selected your classification, you will be prompted to enter information about your building. You will select a name for your page, enter your building’s address and have the opportunity to select your Facebook Page URL. Facebook will also ask you to select your page’s category from their list. First type how you would classify your industry or building, and then Facebook will give you a list of options to choose from.

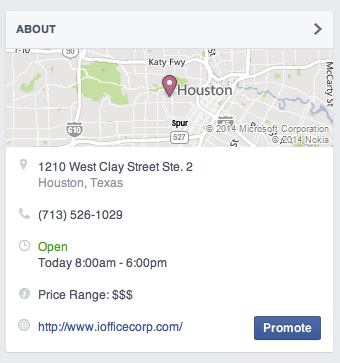
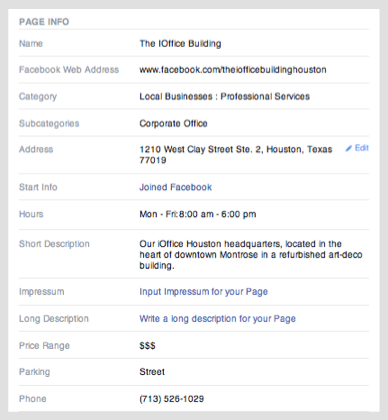
Once you complete the about section, Facebook will guide you through adding photos and will give you an option to add advertisements to get your fan base started (which is not required). If you want to skip this step, just select “next”. Once you get to your page, be sure you have entered all of the most basic information in your “about” section, which is located under your profile image. You can edit your building’s hours, location, telephone number, price range and parking information here.
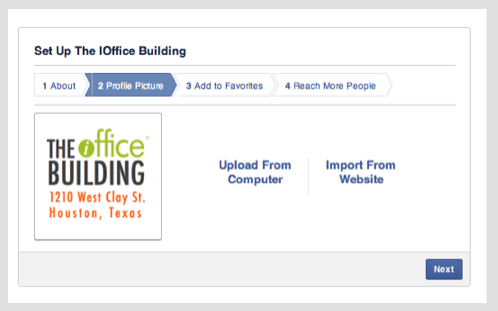
Step 3: Add A Cover Photo and Profile Photo
This is where you really get to show off your building’s personality! For this example, we chose our iOffice logo and our address for the building page. You want to select an image that’s immediately recognizable, so an image from your website or other branded materials would work beautifully. You could also select an actual picture of your office, but that might work better if reserved for your cover photo (see below).
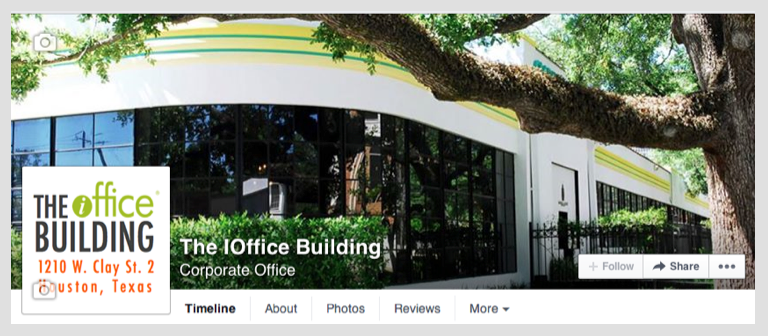
Your cover photo takes up some serious real estate. It is going to be the first thing people see when they visit your page. If you’re the FM for a university, you can choose a cover photo of a iconic campus gathering spot, a bird’s eye view of the entire campus or just the building you’re making the page for. If you manage a corporate office, consider choosing an image that either is recognizable (like the front entrance) or even your building’s reception space.
Step 4: Start Posting
The main purpose of your Facebook page is to keep your fans updated with relevant content! Facebook currently allows six types of posts, although these do change periodically.
Your current post options are:
- Text status updates
- Posting a photo
- Posting a video
- A link post to an alternate site
- An event post
- A post with a location check-in
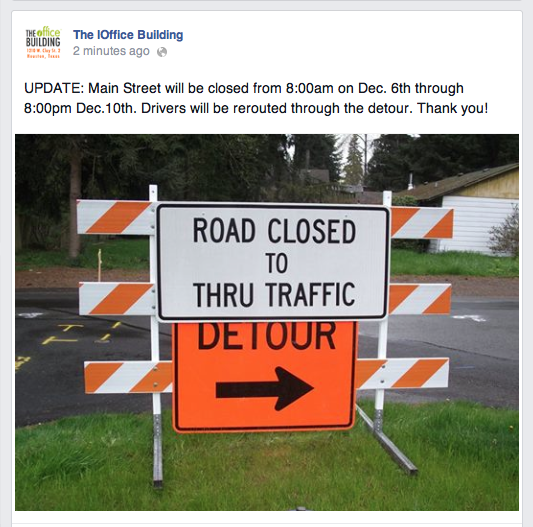
The best method of action is to put yourself in your future followers’ shoes. What would you like to see on this page? If you’re creating a page for a university, a good start would be posting a link to the campus website, and maybe an updated map of the building. Or, if you’re undergoing construction, posting an update of road closures and building maintenance can cut down on phone calls you receive.
To get your page rolling, you also have to have fans! Start with getting your FM team to “like” the page, and encourage building tenants to do the same. You can also invite your personal friends to like the page if you wish.
Step 5: Keep Up With Maintenance
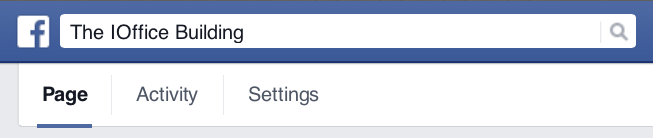
One thing about managing an office in that it’s never quite the same as the day before! Keep in mind that you can always change information as you please. This is especially important if your building honors holiday hours or has major renovations going on. To do so, select the “settings” tab on the top left corner of your homepage. You can also visit the “activity” tab to see how your fans are engaging and previous posts. To head back to your building’s page, simply select the “page” tab.
One mistake people often make is they create their Facebook page, update their building information, office photos, and then never visit the page again! Now, it’s completely understandable that you’re busy, we all are, and you maybe can’t post as often as you’d like to. A good rule of thumb to practice is at the very least post once per week. By doing this, you’re letting your audience know you’re listening, you’re active and they’re getting the most relevant information on your building possible.